Yes — holes, pinholes, or missing grout in a shower are a problem. Not a “fix it next month” problem. Once water gets behind the tile, you’re looking at framing damage, mould in the wall cavity, or the leak surfacing on the ceiling of the room below. Most of the time the grout itself isn’t the cause though — it’s a symptom. Something else has moved, failed, or was installed wrong. This page walks through what causes it, when DIY actually works, when you need a professional regrouter, and roughly what it costs in Sydney in 2026.

Are holes or pinholes in shower grout a real problem?
Short answer: yes, every time. The grout is the waterproof seal between tiles. Holes in it mean water has a path through to the substrate. Even pinhole-sized gaps will, over months, soak into the cement board or plasterboard behind the tile. That’s where the slow-burn damage happens — soft walls, mould inside the cavity, eventually framing rot or a ceiling stain in the room below.
Pinholes in particular get dismissed because they look cosmetic. They aren’t. Surface tension stops you from seeing water enter them, but warm shower water with detergent in it goes through fine. By the time the visible damage shows up, the wall behind has usually been wet for months.
Worth saying: a few hairline cracks aren’t the same as holes. Hairlines are usually surface shrinkage in cement-based grout — annoying, eventually a problem, but slower-moving. Actual holes, missing chunks, or pinholes that go through the grout depth — those are immediate-attention jobs.
What causes holes in shower grout?
In 26+ years across Sydney bathrooms — Hills District, North Shore, Eastern Suburbs, Northern Beaches, Inner West — we see the same five causes:
- Cement grout degradation. Standard cement-based grout absorbs water. Every shower puts moisture into the joint, and over 5–10 years the binder breaks down. Grout literally erodes back into the joint. This is the most common cause we see in older bathrooms.
- Bad initial install. Grout was packed too dry, not pushed into the joints properly, or air bubbles weren’t worked out before it set. The pinholes were there from day one — they just took time to show.
- Movement in the substrate. If the wall sheet or floor flexes (poorly fixed cement board, settling slab), the grout cracks and chips out at the high-stress points. Usually shows as cracks in a linear pattern, not random holes.
- Aggressive cleaning. Acid-based tile cleaners, scouring pads, or stiff brushes pull the binder out of cement grout over time. The grout looks clean but it’s been thinned to where it’s full of micro-holes.
- Previous repair gone wrong. Someone DIYed a patch over old grout instead of removing the failed grout first. New grout doesn’t bond to old, and the patch falls out inside 12–18 months — leaving more holes than you started with.
What to do if a contractor left holes in your grout
Happens more than people think. Bathroom renovation finished, looks great for a fortnight, then pinholes show up across the shower wall. Or chunks of grout fall out near the corners after the first month of use.
If the bathroom was completed in the last 12 months and the original tiler is contactable, that’s your first call — most reputable tilers will come back and fix grout failures inside their workmanship window. Document the holes with date-stamped photos. Send them in writing so there’s a record.
If the tiler is uncontactable, has gone out of business, or is refusing to come back — you have two paths in NSW: lodge a complaint with NSW Fair Trading if the work is under their warranty period, or get the failed grout repaired by another contractor and chase costs separately. Most of our remedial jobs from failed installs sit in the second category — clients want the shower fixed and waterproof now, not after a six-month dispute.
When you bring a regrouter in for a contractor-failure job, get the assessment in writing. We document what we find — original grout type, depth of failure, evidence of the install issue — so if you do pursue the original tiler, you have a defensible record of what was wrong.
What does shower grout repair actually cost in Sydney in 2026?
Two different jobs sit under “grout repair”, and the cost gap between them is big.
Patching a few isolated holes: $200–$500 callout job. Only worth doing if the rest of the grout is genuinely sound and you’ve identified a localised cause (one chipped area, a single corner failure). We don’t recommend this often — patching matched to existing aged grout never looks seamless and usually fails again within two years because the surrounding grout is the next to go.
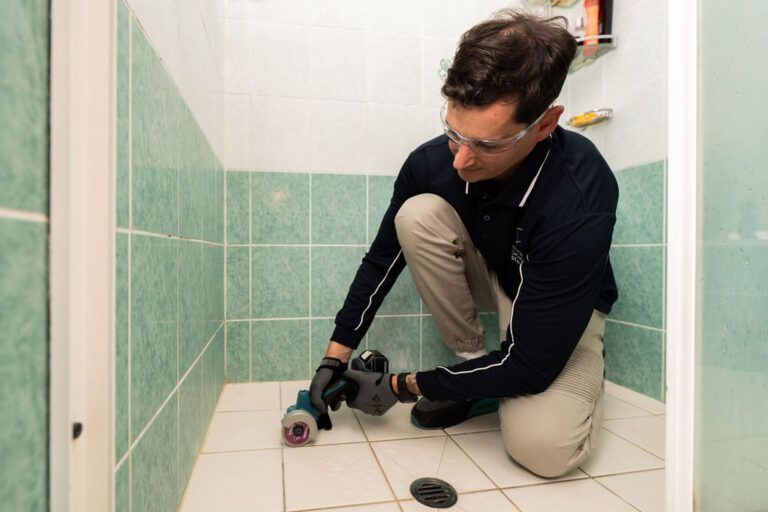
Full shower regrout (which is what most “holes in grout” jobs end up being): $1,400 to $2,500 for a typical residential shower. That’s a complete strip of the failed grout, prep, new epoxy grout (Ardex EG15 in most jobs), and resealed silicone in the corners. Out of action for 24 hours. 10-year warranty on the grout itself.
The range depends on shower size, current grout state, whether silicone resealing is included, and how much work the prep takes. Walk-in showers and dual-head enclosures sit toward the upper end. Standard 1.5m × 1.5m enclosures sit lower.
For comparison: a full bathroom renovation in 2026 starts around $25,000 and runs to $50,000+ with proper waterproofing. If the bathroom is otherwise sound, regrouting at $1,500ish is the right answer 70% of the time. The other 30%, the tile or substrate has gone and you need a builder, not a regrouter.
When DIY actually works (and when it doesn’t)
Honest answer — DIY grout repair can work, on the right job, with the right materials, and enough patience to do the prep properly. Where it falls over is the prep.
DIY is realistic when:
- It’s a non-primary bathroom and you can have it out of service for a long weekend.
- The holes are localised — one corner, one section — not throughout the whole shower.
- You’re using epoxy grout (not cement) and you’ve watched a couple of credible videos on mixing the ratio correctly.
- You’ve got an oscillating multi-tool with a grout removal blade — manual grout saws work but you’ll spend 4–6 hours doing what a tool does in 2.
- You can plastic-sheet the bathroom properly and wear a P2 mask for the dust.
Don’t DIY when:
- It’s your only/primary shower and you can’t lose 3+ days of access.
- The holes are throughout the shower — that’s a full regrout, not a patch.
- You see signs of water already behind the tiles (soft wall, stain on the other side, ceiling damage below).
- It’s a rental and you need warrantied work.
- You can see the cement board behind through the grout — that’s substrate damage, not a grout problem.
Where DIY jobs fail most often: mixing epoxy wrong (the resin-to-hardener ratio is unforgiving — too much resin and it won’t cure, too much hardener and it sets before you finish), removing only the top layer of grout (new grout doesn’t bond to old — the job fails in 18 months), and trying to colour-match aged grout (you can’t, the patch will always show).
If you do want to DIY — the short version
If you’ve read the above and decided it’s a DIY job, here’s the brief:
- Remove ALL the failed grout in the affected area — not just the visible holes. Depth: at least 2/3 of the grout joint depth. Use an oscillating tool with a grout removal blade. Wear a P2 mask. Plastic-sheet the bathroom.
- Vacuum + wipe the joint clean. Let it fully dry before regrouting. Any dust left behind ruins the bond.
- Use epoxy grout, not cement. Premium options like Ardex EG15 are what professionals use for a reason — they don’t absorb water, don’t host mould, and last 10+ years.
- Mix exactly to the ratio printed on the pack. Epoxy is unforgiving — wrong ratio = no cure or instant cure.
- Push the grout into the joints at an angle with a grout float. Work it in. Don’t just spread it on top.
- Wipe back with a damp sponge (not soaking — damp) within the working window on the pack. Rinse the sponge constantly.
- 24-hour cure before you let water near it.
Skip any of those steps and the repair fails. That’s the honest gap between DIY and a pro job — we’ve done it 10,000 times and the prep is automatic; first-timers usually rush a step.
When to call a regrouter instead
Call a pro when any of these apply:
- It’s your primary shower and you can’t lose access for the weekend.
- The holes are widespread, not localised.
- You’re seeing leaks downstream (ceiling stain below, soft wall behind).
- It’s a rental and you want the work warrantied.
- You want a colour change while it’s being done — epoxy comes in white, grey, charcoal, beige, colour-matched.
- The bathroom is older and you suspect the cement grout is failing site-wide, not just where the holes are.
Onsite quotes are 30 minutes, no charge. We diagnose what’s actually failing (grout, substrate, silicone, or pipework) so you don’t pay to fix the wrong thing.
Frequently asked questions
Can I just patch the holes instead of regrouting the whole shower?
Sometimes — but rarely worth it. Patched grout never matches the surrounding aged grout visually, and the surrounding grout is usually the next bit to fail anyway. We’ll quote a patch job if the grout is genuinely sound everywhere else and the cause is localised. Most of the time, full regrout is the better-value answer.
How long does a professional regrout last?
10–15 years with epoxy grout and proper prep. We use Ardex EG15 — Ardex Academy accredited installation, work compliant with AS3740-2010 (Australian Standard for waterproofing of domestic wet areas). 10-year grout warranty.
How long is the shower out of action?
One day on site, 24-hour cure. Wednesday job, Thursday evening shower. The rest of the bathroom stays usable while we work — toilet, basin, no plumbing isolation needed.
My grout has small pinholes — is that really a problem?
Yes. Pinholes look cosmetic but they let water through. Surface tension stops you from seeing it happen, but warm soapy shower water goes through fine. Over months it soaks into the substrate. We get callouts for “tiny pinholes” that have caused $5,000+ in framing damage — get them addressed before they become a structural problem.
Will regrouting fix a leaking shower?
If the leak is through failed grout or silicone — yes. If it’s through a cracked tile, damaged shower base, or behind-the-wall pipework — no. We diagnose at the onsite quote. If regrouting isn’t the right fix, we’ll tell you and turn the job down rather than do work that won’t solve the problem.
Do you service my suburb?
Sydney-wide — Hills District, North Shore, Eastern Suburbs, Northern Beaches, Western Sydney, and Inner West. Family-run, 26+ years on the tools.
Book an onsite quote
If you’ve got holes in your shower grout, the longer it’s left, the more likely you’re paying for water damage on top of the regrout cost. Onsite diagnosis is 30 minutes, no charge. We tell you straight whether it’s a regrout job, a patch job, or something we need to refer to a builder.
Call 1300 815 512 or book a free onsite quote.
Leaking Showers Sealed — Andreas Jagle, owner. NSW Contractor Licence 89111C. Ardex Academy accredited. AS3740-2010 compliant. 135+ five-star Google reviews. Servicing Sydney’s Hills District, North Shore, Eastern Suburbs, Northern Beaches, Western Sydney, and Inner West.